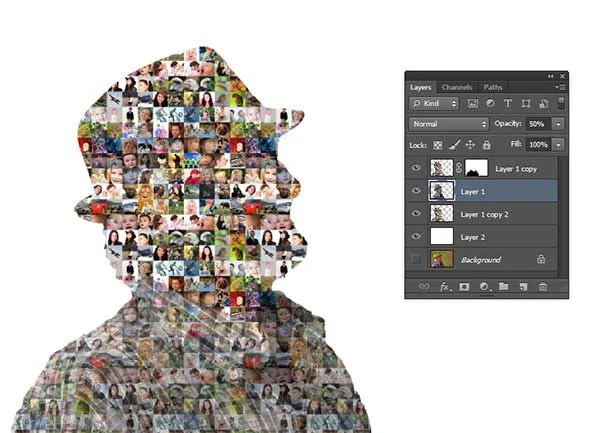
Here is a tutorial on how to create a silhouette that is filled with a mosaic photo collage in Photoshop. The first step is to create a mosaic pattern, and then make a selection in the main picture, and finally, fill the selection with mosaic.
Step 1: Create a Document Pattern
Select File> New, simply create a document for a mosaic pattern. I will create a new document with 1000x1000 pixels size.
Step 2: Show Grid
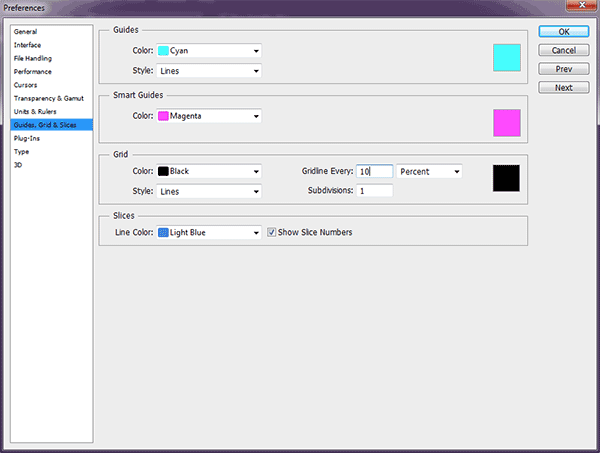
Show Grid by choosing View> Show> Grid. Set the number of the grid by choosing Edit> Preferences> Guides, Grid & Slices.Step 3: Place Photo Into Document
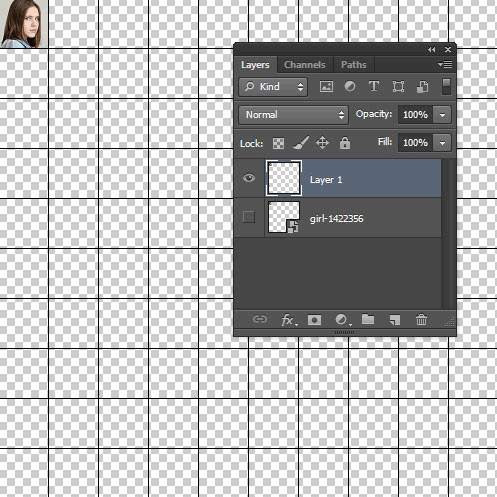
Choose File> Place, select a photo, then click Place button.
Adjust the size and position on the document using Free Transform. Make a selection using the Rectangular Marquee Tool and then choose Layer> New Layer via copy. You can then delete the original layer.
For this Photoshop Collage tutorial, I'll use images that I downloaded from Pixabay.
Step 4: Put Another photo
Repeat step 3 until the entire grid is filled with photos.Step 5: Define Pattern
I will use the Quick Selection Tool to make a selection and then split the selection by choosing Layer> New> Layer via copy. Stock 540658. Duplicate Layer 1 by choosing Layer> Duplicate Layer.
Step 7: Fill Selection With Mosaic Pattern
Right-click on Layer 1 and then select the menu Select Pixels. Select Edit> Fill, choose Pattern on Use field, select the mosaic pattern that we created earlier. Click OK.
Step 8: Make Selection On Clothes
Create an empty layer, fill with white color and drag it to the lowest position. Duplicate Layer Mosaic and drag it to a position above the white layer. Uncheck mosaic layer visibility, then make a selection on the clothes using the Pen Tool.
Step 9: Create Mask
Check the mosaic layer visibility option and then choose Layer> Layer Mask> Hide Selection.
Step 10: Adjust Layer Opacity
Click the clothes layer, choose Image> Adjustments> Desaturate, and then adjust the opacity to 50%. Once you have finished, you will probably also want to use File>Save As (Shift+Ctrl+S) to export the image in a more widely used format, such as JPEG, PNG, TIFF, etc.


Ur amazing with your works :)
ReplyDeleteThank you :)
Delete