In this tutorial, you will learn how to create a heart-shaped photo collage template in Photoshop. We'll be using the Custom Shape tool, the grid, Rectangle tool, Free Transform and Clipping Mask that comes with Photoshop. Once you have arranged all shapes to your satisfaction, you can play around with other Photoshop's tools to add your own artistic effects. Let's get started!
If you liked my tutorials, please subscribe to my YouTube channel - JTSGraph.
Download These Templates
Click the links below to download the heart Photo collage templates (PSD):template#1, template#2, template#3, template#4, template#5, or find others free Photoshop Collage Templates.
Steps to make a heart-shaped collage in Photoshop:
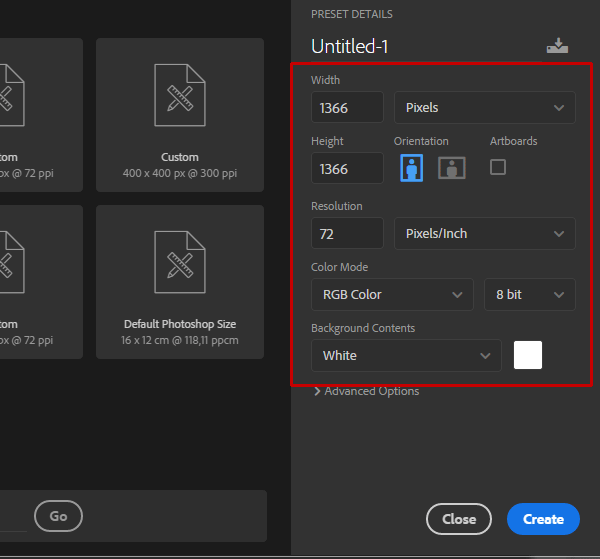
1. Create new Document.
Choose File> New (or Ctrl+N) to create a new document. 2. Grab the Custom Shape Tool.
Grab the Custom Shape Tool from the Tools panel, or press U.
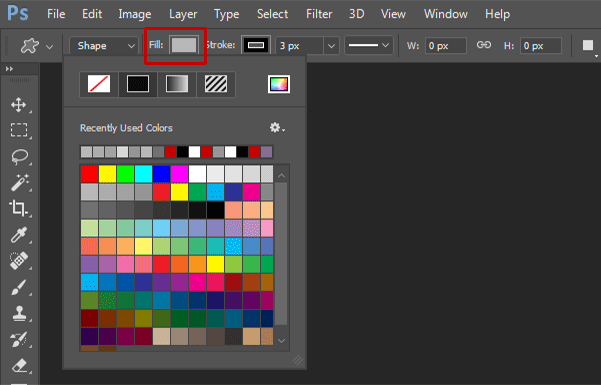
Choose shape color. Click the color swatch in the options bar, and then choose a color available.
Enter a value for the stroke size.
Select a heart shape from the Custom Shape pop-up panel.
When you release your mouse button, Photoshop completes the Heart Shape and fills it with your chosen color.
4. Create the Grid.
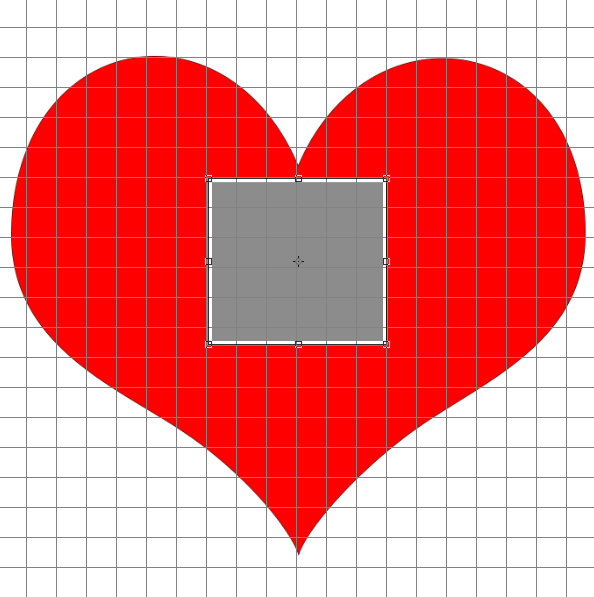
Now we need to create a grid to assist us in laying out rectangle shapes symmetrically. To add the grid, choose View>Show>Grid.Choose View>Snap, to enabling snaping that will help you to align any object (including shape) you want.
Choose the color you want for the grid lines. I will set the “Gridline every” option to be 5 percent and “Subdivisions” option to be 1.
In the Options Bar, make sure Shape is chosen from the menu then choose shape color.
7. Draw a Rectangle Shape.
Click inside your document and drag away from the starting point. When you release your mouse button, Photoshop completes the rectangle shape and fills it with your chosen color.Resize the shape by dragging any corner while holding down the Shift key to keep the shape doesn't distort.
Drag to move or use the arrow keys on the keyboard to reposition it. Press Enter when you're done.
9. Duplicate Shape.
Duplicate the shape layer by choosing Layer> Duplicate Layer, or Ctrl + J. Then resize and reposition it using Edit> Free Transform. Now, you can edit the rectangle shape as follows:- Resize the rectangle shape by dragging any corner while holding down the Shift key to keep the shape does not distort.
- Move the rectangle shape by clicking and hold anywhere inside the shape and drag.
- Rotate the rectangle shape by moving your cursor farther out from any corner until you see two arrows. Click and hold, then drag the shape.
- Press Enter key when you are done.
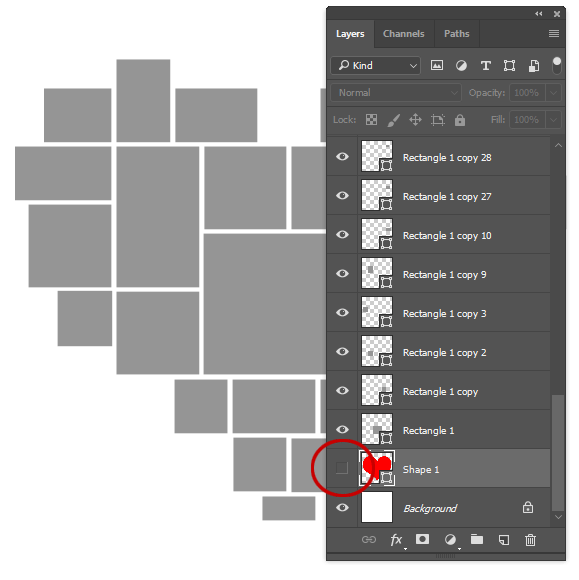
10. Hide or Delete the Heart Shape.
You can delete the heart shape or simply turn off its visibility option by clicking the eye icon on the left. 11. Save File As Template.
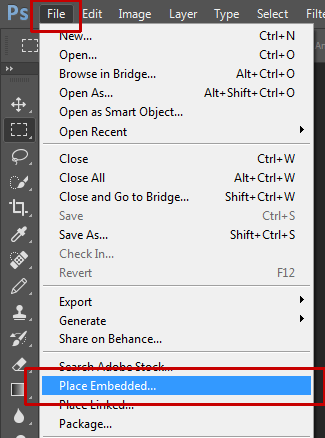
Choose File>Save or Ctrl+S to save your project file as a template for later use. Save this template file so that someday you can use it again.12. Insert Image.
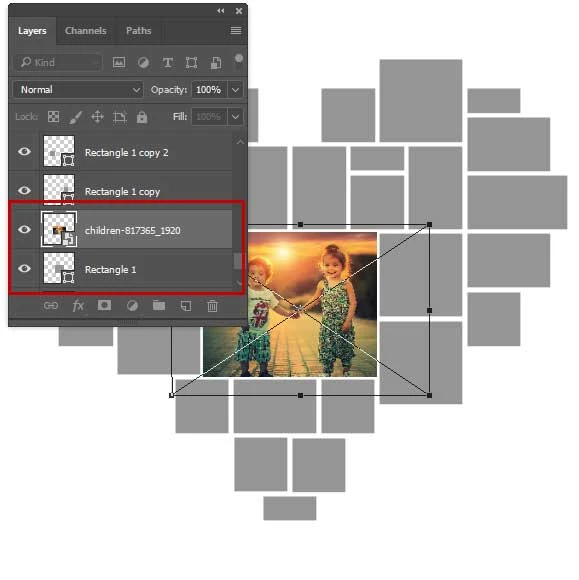
Stock images used in this Photoshop Collage tutorial: 1241817, 1328454, 738303, 920128, 1508121, 807566, 1226954, 649021, 649020, 457237, 1347385, 1387118, 817368, 807547, 807531, 738310, 807544, 817364, 817361, 807536, 807533, 738306, 738305, 738302, 738287, 457234, 958457, 633453, 817365.Select the layer to which you want to insert an image.
Click on the picture, then click OK. You can now edit and move the picture as follows:
- Resize the picture by dragging any corner while holding down the Shift key to keep the picture does not distort.
- Move the picture by clicking and hold anywhere inside the image and drag.
- Rotate the picture by moving your cursor farther out from any corner until you see two arrows. Click and hold, then drag the picture.
- Press Enter key when you are done.
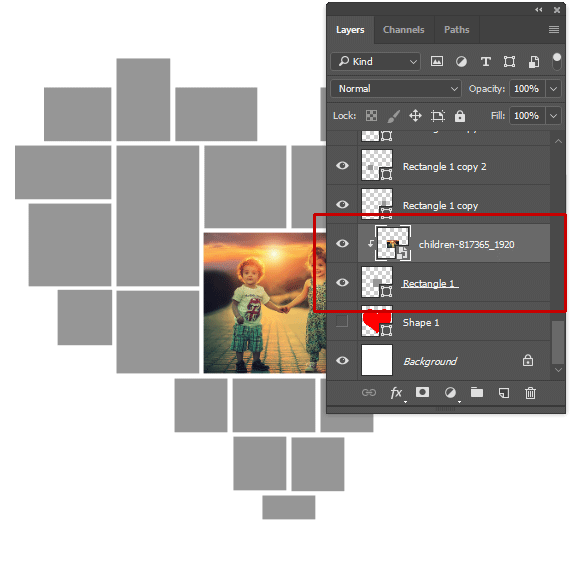
13. Create Clipping Mask
You must stack the image layer above the Rectangle layer. Click the image layer to be clipped, then choose Layer>Create Clipping Mask or Alt+Ctrl+G.
14. Insert Other Images.
Repeat steps 12 through 13 to open and manipulate each picture you'd like to insert. 15. Save Your Document.
Choose File>Save or Ctrl+S to save your collage.
There you have it! a heart colage in Photoshop.











Very nice thank you
ReplyDeleteglad you liked it :)
Deletethank you very much. great work. love it.
ReplyDeleteNice bro keep it up best of luck for your great future🙂🤗
ReplyDeleteGreat work
ReplyDeletethank you very much
Glad you liked it :)
Deleteplease update the link about heart shaped photo frame
ReplyDeleteHere's the link to download this template http://bit.ly/2I2LkPb
DeleteIf you liked this Photoshop tutorial, then please share it
Thank you
Thanks a lot for your contribution
DeleteIs there any download?
ReplyDeleteHere's the link to download this template http://bit.ly/2I2LkPb
DeleteIf you liked this Photoshop tutorial, then please share it
Thank you
How to download
DeleteThank you
Deletehello
ReplyDeleteIf you liked my work, please subscribe to my Youtube channel. Thank you :)
DeleteIf you liked my work, please subscribe to my Youtube channel. Thank you :)
ReplyDeleteTHANK YOU SO MUCH
ReplyDeleteYou're welcome :)
DeleteThanks so much! I was doing one myself, but this saved me some time and made it easy! TY!
ReplyDeleteGlad you liked it :) Thank you
Deletenice work bro also subscribed your Youtube channel :)
ReplyDeletethanks for the download files keep going...
You're welcome. Thank you.
Delete