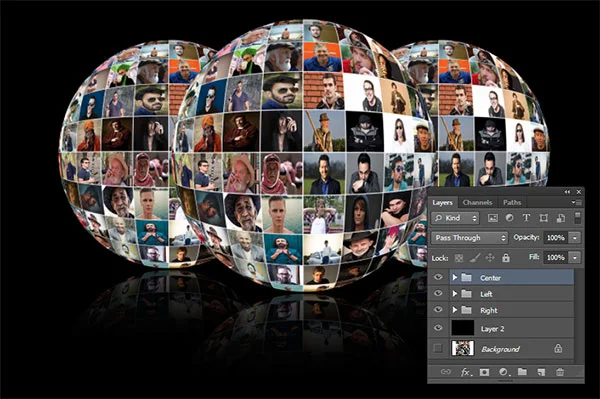
In this Photoshop tutorial, we are going to learn how to create a spherical photo collage using the Elliptical marquee tool and spherize filter that both come with Photoshop. We’ll make a contact sheet from multiple images then apply the Spherize filter to it. To create the reflection, we will use a layer mask and the gradient tool. You can duplicate the spherical collage and arrange it all to your satisfaction. [Updated using Contact Sheet, January, 5, 2021]
Download This Template
Download project file (PSD) here.Download Contact Sheet (PSD) here.
Find others free Photoshop Collage Templates here.
1. Open An Image
Choose File> New (or just press Ctrl+N).
Navigate to the “source” folder that contains your images then select any image.
If your file does not appear, try to view all files by selecting All Formats from the Files of type list.
Click the Open button.
2. Create an Action to Resize Images
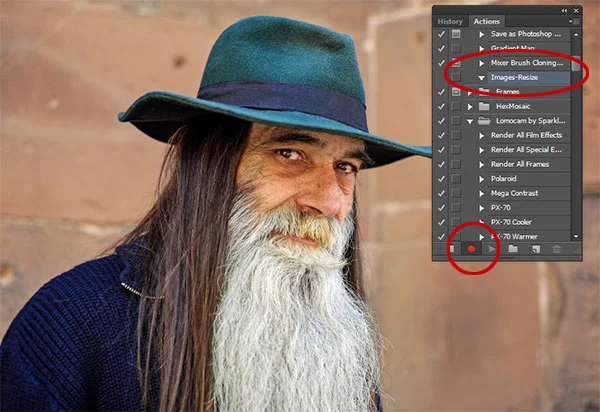
Select Windows>Actions or else just press Alt+F9 to open the Action panel.
Click the Create new Action icon in the Action panel.
The New Action dialog box appears.
Named the Action "Images-Resize", set to Default Actions then click the Record button.
The Begin Recording button in the Actions panel turns red.
The Begin Recording button in the Actions panel turns red.
3. Perform the operations to resize the image
Now perform the operations to resize the image.
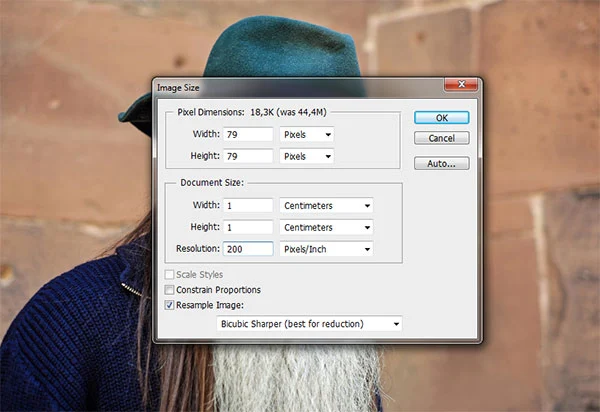
Choose Image> Image Size or else just press Alt+Ctrl+I.
The Image Size dialog box appears.
Enter the following information: Width 1 cm, Height 1 cm, Resolution 200 px, tick Resample Image, select Bicubic Sharper.
Click OK.
Stop recording by clicking the Stop Playing/Recording button or else just press the Esc key.
Close the image, no need to save the resized result.
Stop recording by clicking the Stop Playing/Recording button.
4. Start Resize All Images
Now you have an Action to resize all of your images in the “source” folder.
Choose File>Scripts>Image Processor.
The Image Processor dialog box appears.
Select the source folder that contains your images, select the location to save the processed images, tick the Save as JPEG checkbox, tick the Resize to fit checkbox, enter 79px for W and H value, tick the Run Action checkbox, choose Default Actions, and your Action, “Images-Resize”.
Click the Run button.
Wait for a moment until all of your images are resized.
5. Create Contact Sheet
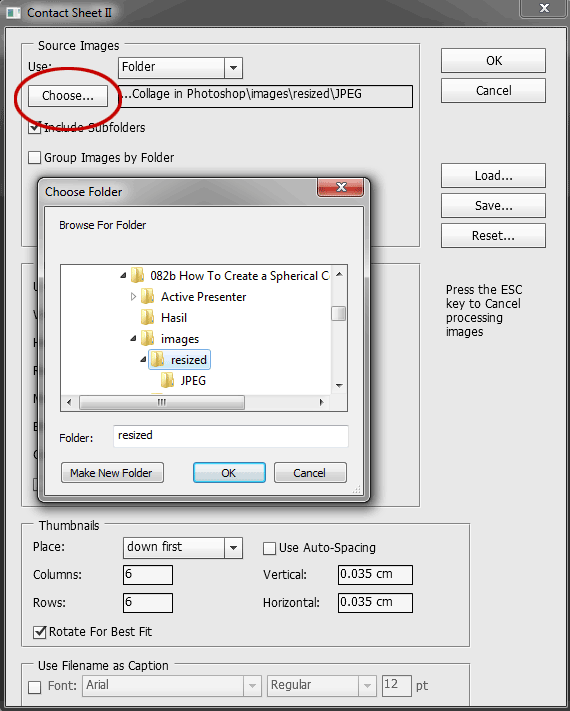
Now Create a Contact Sheet. Choose File > Automate > Contact Sheet II in the top menu.
The Contact Sheet II dialog box appears.
In the dialog, under Source Images, choose Use: Folder. Click Choose...and navigate to the folder that contains your images, then click OK.
6. Document Settings
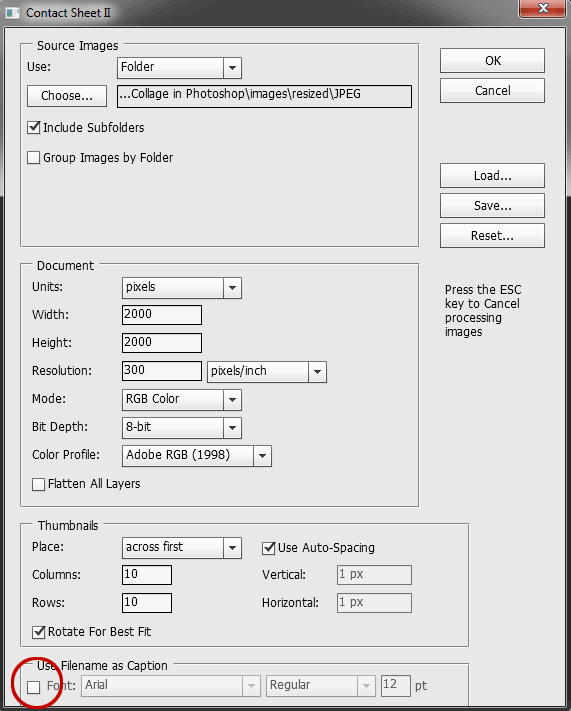
Under Document, choose Width, Height, and Resolution values for the contact sheet file, and also choose Mode, Bit Depth, and Color Profile settings.
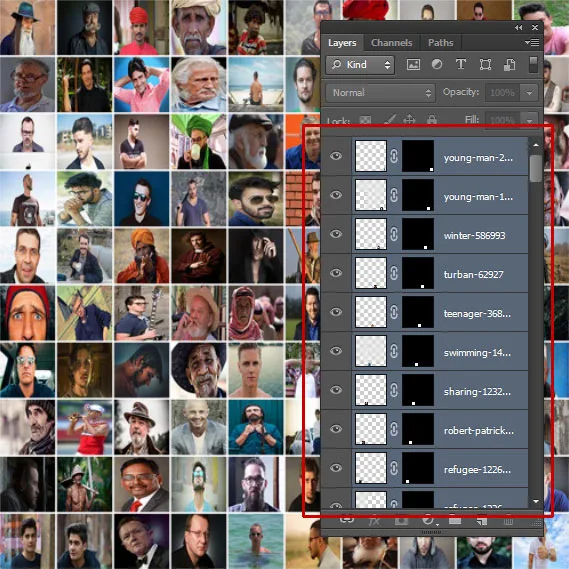
Uncheck Flatten All Layers if you want to have a separate image layer (with a mask) for each image.
7. Thumbnails Settings
Under Thumbnails, choose a Place option for the order of thumbnails, and the desired number of Columns and Rows.
Check Use Auto-Spacing to let Photoshop calculate the spacing between images.
Uncheck Rotate for Best Fit to have the images keep their original orientation.
8. Caption Settings
Uncheck Font if you don’t want to have a caption containing the file name appear below each image.
Click OK.
Please wait for a moment, while Photoshop opens each image and creates the contact sheet.
9. Merge All Layers
While holding the Shift key, click all the layers in the Layer Panel then choose Layer>Merge Layers (Ctrl+E).
10. Draw a Circle Selection
Select the Elliptical Marquee Tool at the top of the Tools panel. or else just press M.
Press Shift+M to cycle through the four available marquee tools until the one you want is active.
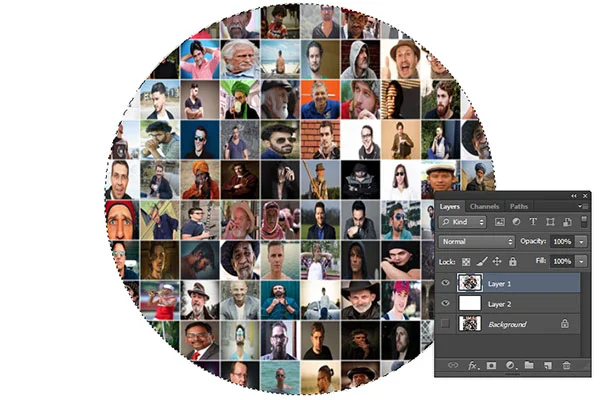
To draw a circle selection, drag the mouse in the document window while holding down the Shift key to keep the circle selection does not distort.
If you want to move the selection, drag your mouse while pressing the space bar.
To draw a circle selection, drag your mouse in the document window while holding down the Shift key to keep the circle selection does not distort.
11. Copy the Selection to a New Layer
Choose Layer>New>Layer via copy (Ctrl+J).
In the Layers panel, the selection is copied in a new layer just above the Background layer.
12. Add Canvas Size (Optional)
Choose Image> Canvas Size.
The Canvas Size dialog box appears.
In the pop-up window, I’ll change the Width with 3000 pixels, click the Relative checkbox and choose center Anchor.
13. Load Selection
Click the new layer to make it active then Ctrl+Click on its thumbnail to load selection.
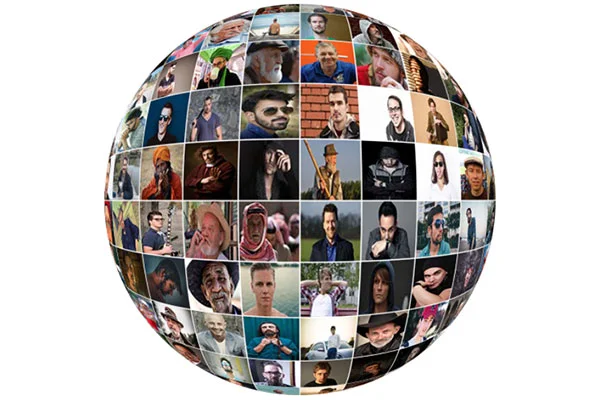
14. Apply Spherize Filter
Choose Filter> Distort>Spherize.
Set 100% for Amount and Normal for the Mode.
Click OK. Choose Select>Deselect to remove the selection.
Set 100% for Amount and Normal for the Mode. Click OK.
Choose Select>Deselect to remove the selection.
15. Duplicate Layer To Create a Reflection
Choose Layer>Duplicate layer. Select the duplicate layer on the Layers Panel.
You can change its size using Free Transform (Ctrl+T).
Select the Move Tool from the Tools panel, or else just press V.
Now using the Move Tool, move the duplicate layer down below the original layer by click and drag, while holding down the Shift key.
Choose Edit>Transform>Flip Vertical to flip it vertically.
You can change its size using Free Transform (Ctrl+T).
Move the duplicated layer below the original layer. Click and drag the duplicate layer below the original layer, while holding down the Shift key.
16. Add a Layer Mask
Choose Layer>Layer Mask>Reveal All to add a Layer Mask to the reflection layer.
17. Create a Reflection
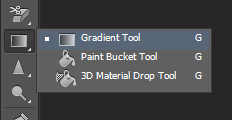
Select the Gradient Tool from the Tools panel, or else just press G.
Press Shift+G to cycle through the six available shape tools until the one you want is active.
Choose Black to White color and Linear Gradient in the options bar.
Make sure the layer mask is selected by clicking on it.
Drag your mouse in the document window to create a reflection effect.
Make sure the layer mask is selected by clicking on it. Drag mouse on the document window to create a reflection effect.
18. Group Layers
Click the sphere and reflection layer while pressing the Shift key then choose Layer>Group Layers.
19. Duplicate the Spherical Collage
You can duplicate the spherical Collage and arrange it all to your satisfaction.
20. Save your document
Choose File>Save or else just press Ctrl+S to save your project file.
The Save As dialog box appears.
Navigate to the folder where you want to store your project file.
Type a name in the File Name text box and leave the default Photoshop (*.PSD;*.PDD) format.
Click Save to store the project file.
Once you have finished, you will probably also want to use File>Save As (Shift+Ctrl+S) to export the image in a more widely used format, such as JPEG, PNG, TIFF, etc.
Here is the result:
How To Create a Spherical Collage in Photoshop.
See also other Photoshop Collage tutorials:














Thank you very much for putting all this together. It is exactly what I needed for a project tonight!
ReplyDeleteGlad you liked it :)
DeleteAwesome sir,pls provide me download link of this psd..
ReplyDeleteDownload it here https://bit.ly/2KEX7SQ
DeletePlease like or subscribe to my youtube channel if you downloaded my work and liked this Photoshop tutorial. Thank you.