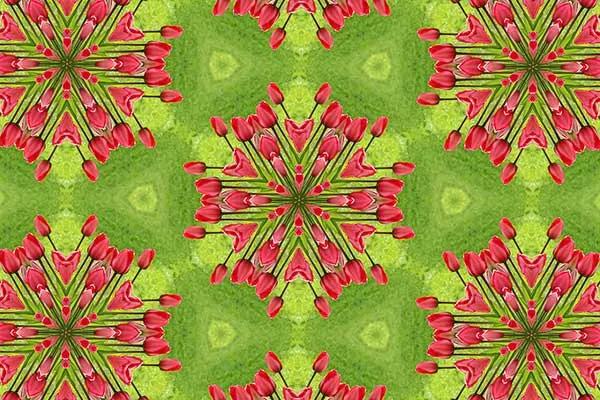
In this Photoshop tutorial, we're going to learn how to create a kaleidoscope pattern using the Rectangular marquee tools and Free Transform command in Photoshop from a given image source. Once you have arranged all the pattern to your satisfaction, you can play around with other Photoshop's tools to add your own artistic effects.
1. Open an Image File
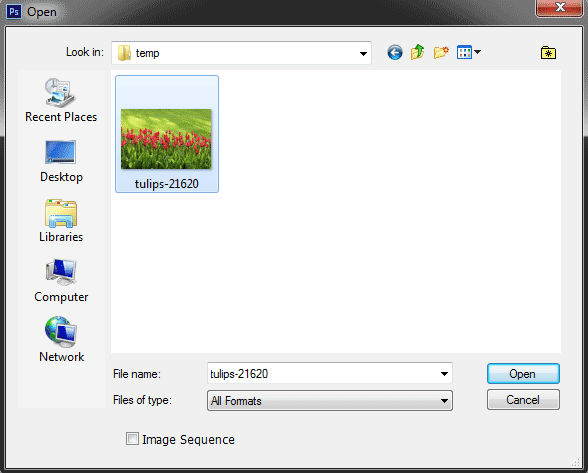
Choose File>Open (or Ctrl+O).
In the standard Open dialog box, navigate to the folder that contains your file then select the name of the file you want to open.
Click Open.
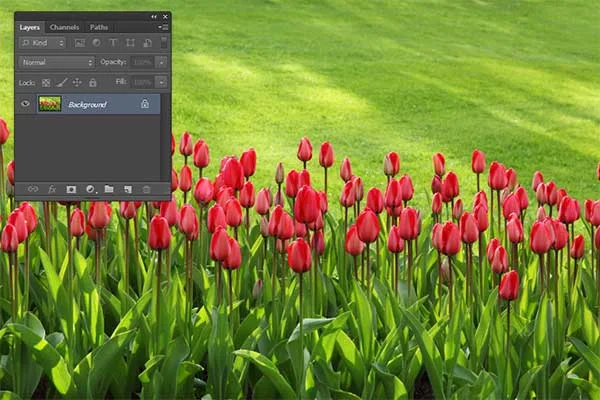
For this Photoshop tutorial, I'll use this image, 21620, that downloaded from Pixabay.
The Open dialog box.
Image used in this tutorial.
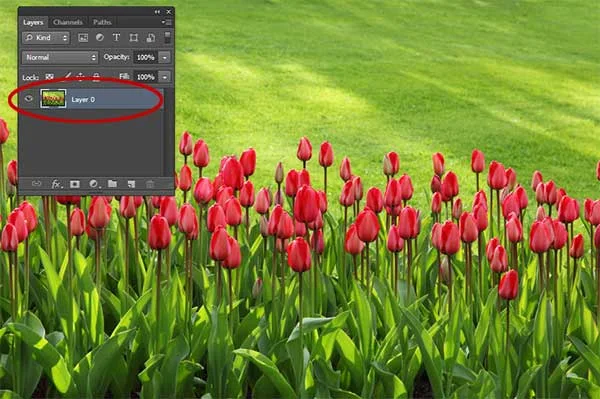
2. Unlock the Background layer
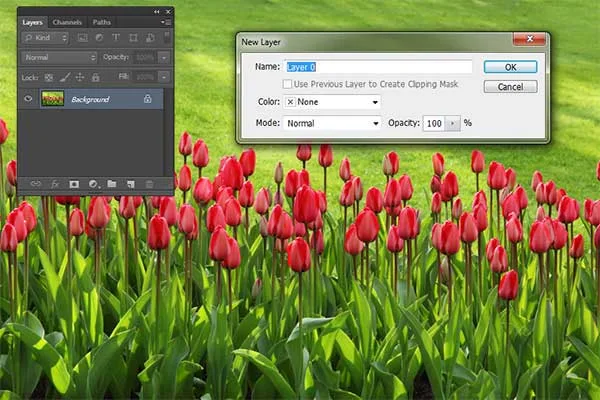
Unlock the Background layer by choosing Layer> New> Layer from Background.
In the New Layer dialog box, just leave the default settings and click OK.
The New Layer dialog box appears.
Unlock the Background layer.
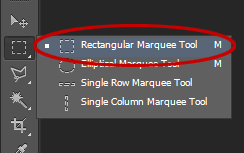
3. Choose the Rectangular Marquee Tool
Select the Rectangular Marquee Tool at the top of the Tools panel (or just press M).
Press Shift+M to cycle through the four available marquee tools until the one you want is active.
On the Options Bar, choose Fixed Ratio style, Widht: 1 and Height: 1.
Select the Rectangular Marquee Tool.
The Rectangular Marquee Tool Options Bar.
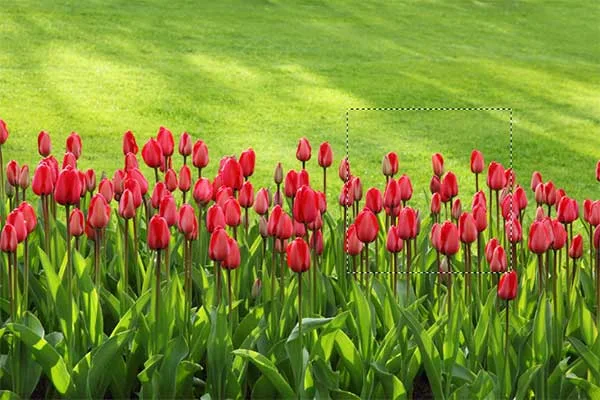
4. Create a Square Selection
Now create a Square Selection on your image.
Drag your mouse diagonally to create a selection.
To move your selection while drawing it, keep the mouse button down, then drag to the new position with the SpaceBar held down.
When you release the mouse, a selection border appears.
If you want to move the selection after releasing the mouse, drag inside it with any selection tool.
Drag your mouse diagonally to create a square selection.
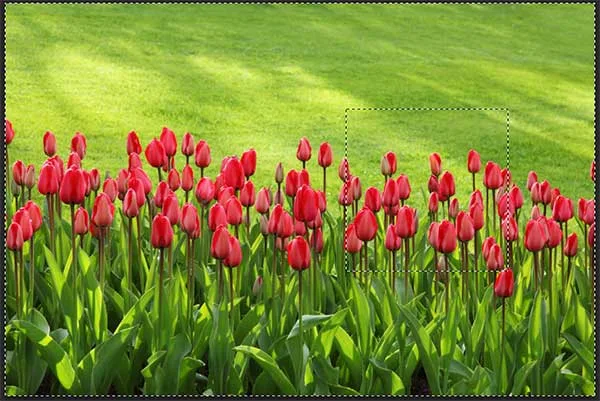
5. Inverse the Selection
Choose Select>Inverse to inverts the square selection in the current layer.
Now all of the layer contents which were previously outside of the square selection are inside it.
Inverse the Selection.
6. Delete the Selection
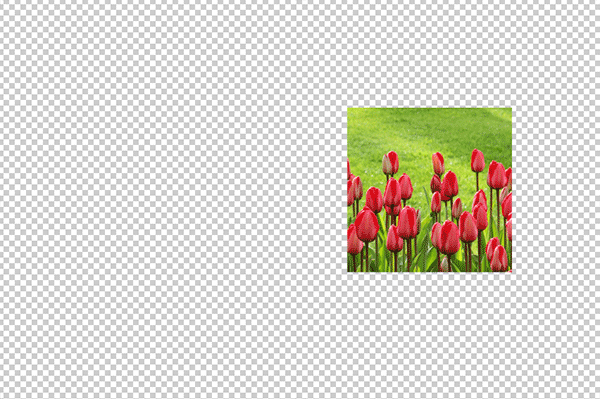
Choose Edit>Clear (or else just press Delete key) to delete all of the layer content inside the selection.
Choose Select>Deselect to remove the selection.
Delete the Selection.
7. Rotate The Square By 30 degree
Go to Edit>Free Transform (or Ctrl+T).
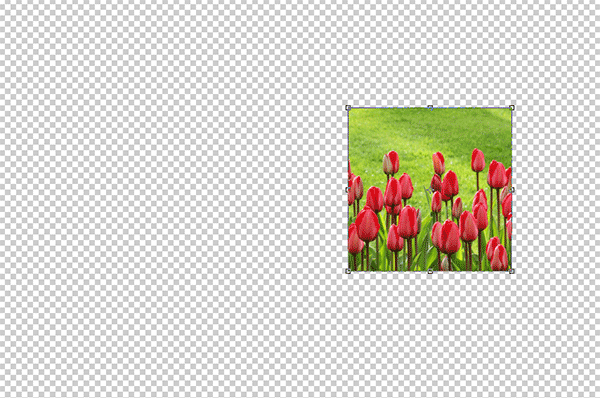
Abounding box surrounds the contents of your square image.
Enter 30 in the options bar to rotate the square by 30 degrees.
When finished, click the commit button on the Options bar (or Ctrl+Enter).
Press Ctrl+T to invoke Free Transform command.
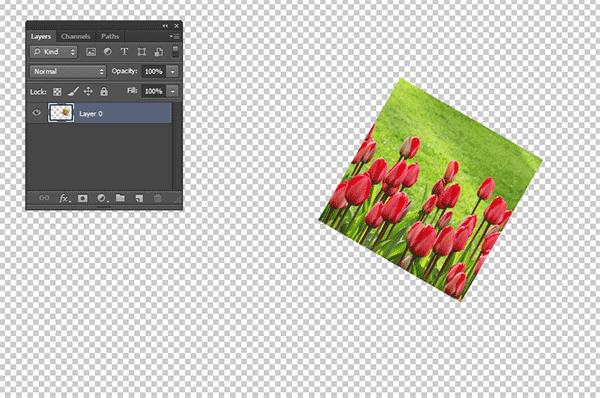
Enter 30 in the options bar to rotate the square image by 30 degrees.
Rotate The Square By 30 degrees.
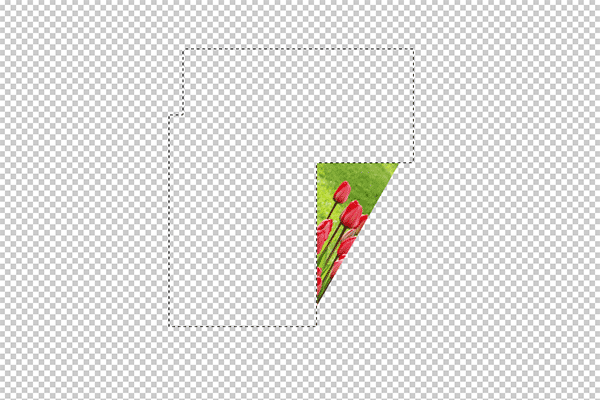
8. Create a Triangle Pattern Image Using the Rectangular Marquee Tool
Select the Rectangular Marquee tool again.
On the Options Bar choose “Add to Selection”.
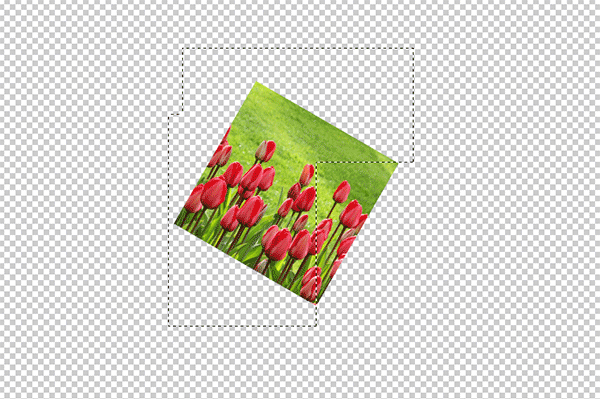
Create two square selection and then press the Delete key to remove the area inside the selection.
On the Options Bar choose “Add to Selection”.
Create two square selection.
Press Delete key to remove.
9. Duplicate The Triangle Pattern Layer, Flip Horizontal and then Merge Layer
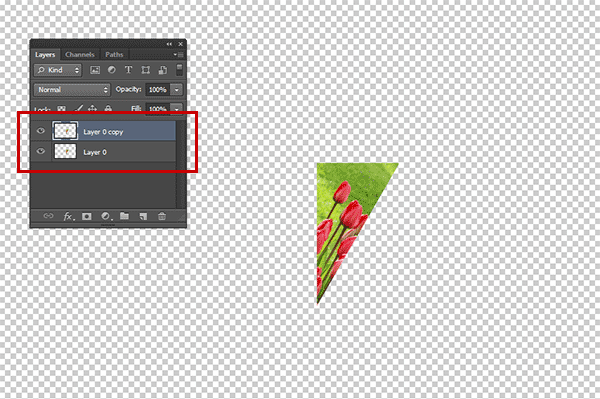
Duplicate The Triangle Pattern Image by going to Layer>Duplicate Layer.
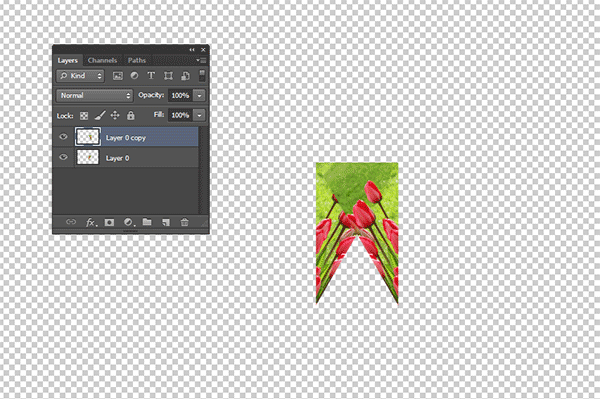
Choose Edit>Transform>Flip Horizontal.
Use the Move tool to align the two triangles then choose Layer>Merge Down.
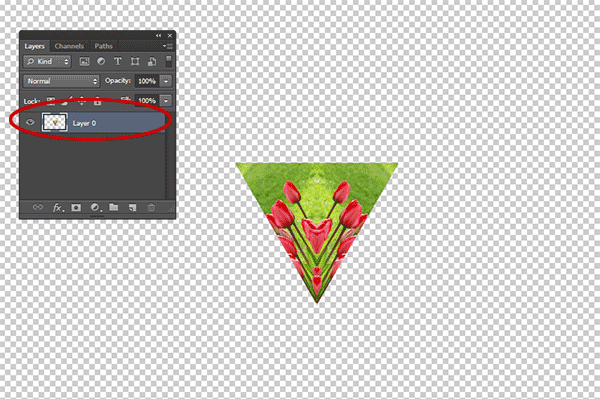
Now we have a new pattern, still in a triangle shape.
Duplicate The Triangle Pattern layer.
Flip Horizontal the duplicate layer.
Use the Move tool to align the two triangles.
Merge layer.
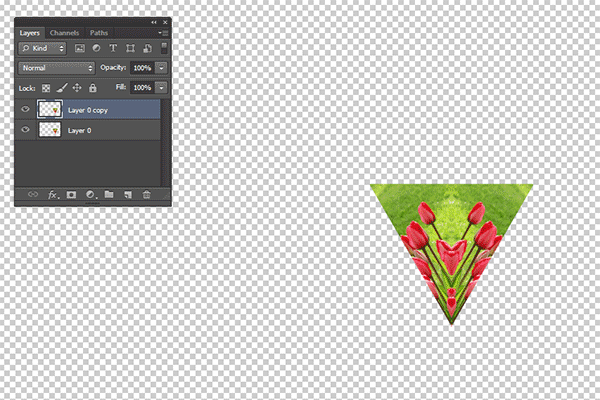
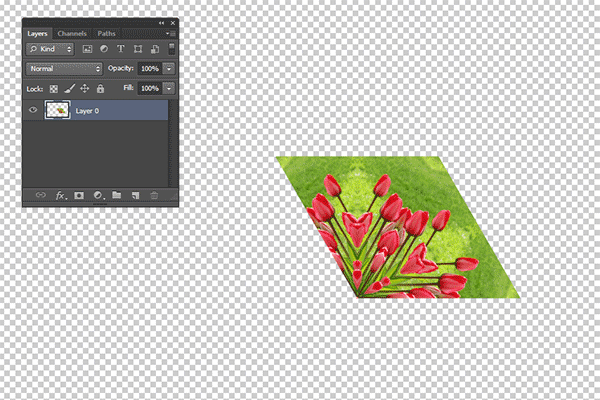
10. Duplicate The New Pattern, rotate by 60 degrees and then merge layer
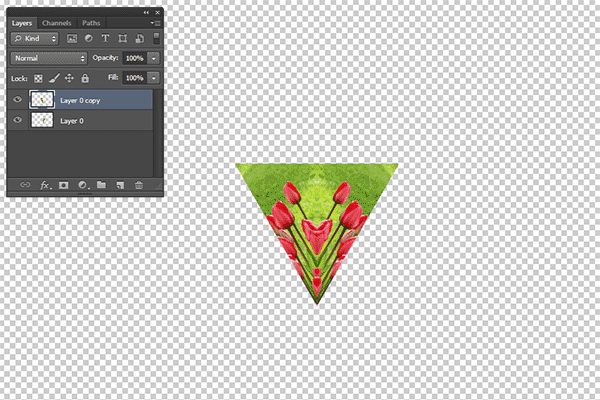
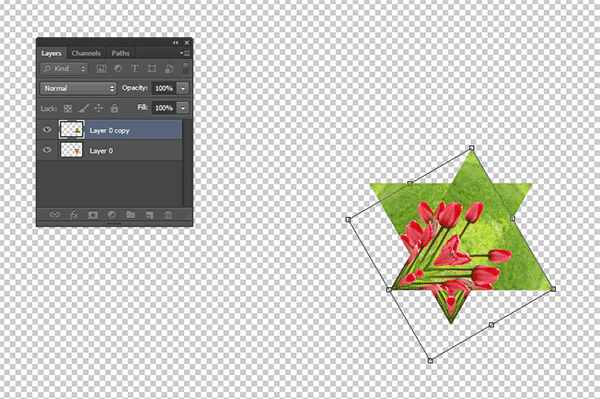
Choose Layer>Duplicate layer to duplicate the new pattern.
Rotate by 60 degrees using Free Transform (Ctrl+T).
Use the Move tool to align the two triangles.
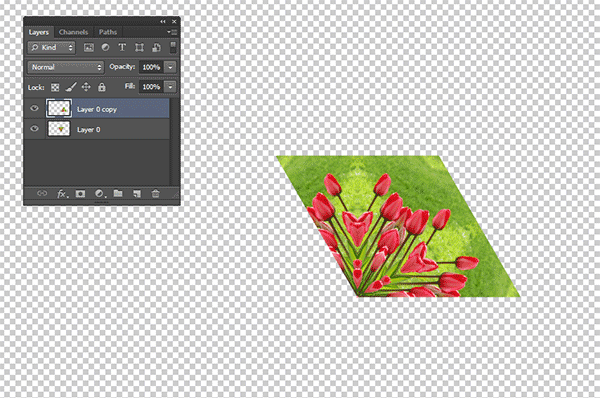
Choose Layer>Merge Down to merge both layers.
Now we have a new pattern in 4 sided polygon.
Duplicate The New Pattern.
Rotate by 60 degrees.
Again, use the Move tool to align the two triangles.
Merge layer.
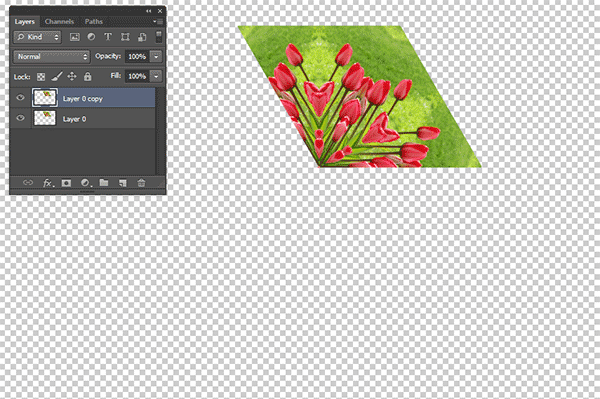
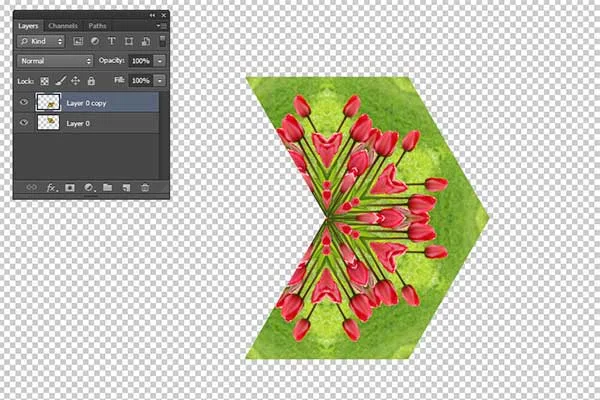
11. Duplicate The New Pattern, rotate by 120 degrees and then align it
Choose Layer>Duplicate layer to duplicate the new pattern.
In the standard Open dialog box, navigate to the folder that contains your file then select the name of the file you want to open.
Click Open.
For this Photoshop tutorial, I'll use this image, 21620, that downloaded from Pixabay.
2. Unlock the Background layer
Unlock the Background layer by choosing Layer> New> Layer from Background.
In the New Layer dialog box, just leave the default settings and click OK.
3. Choose the Rectangular Marquee Tool
Select the Rectangular Marquee Tool at the top of the Tools panel (or just press M).
Press Shift+M to cycle through the four available marquee tools until the one you want is active.
On the Options Bar, choose Fixed Ratio style, Widht: 1 and Height: 1.
4. Create a Square Selection
Now create a Square Selection on your image.
Drag your mouse diagonally to create a selection.
To move your selection while drawing it, keep the mouse button down, then drag to the new position with the SpaceBar held down.
When you release the mouse, a selection border appears.
If you want to move the selection after releasing the mouse, drag inside it with any selection tool.
5. Inverse the Selection
Choose Select>Inverse to inverts the square selection in the current layer.
Now all of the layer contents which were previously outside of the square selection are inside it.
6. Delete the Selection
Choose Edit>Clear (or else just press Delete key) to delete all of the layer content inside the selection.
Choose Select>Deselect to remove the selection.
7. Rotate The Square By 30 degree
Go to Edit>Free Transform (or Ctrl+T).
Abounding box surrounds the contents of your square image.
Enter 30 in the options bar to rotate the square by 30 degrees.
When finished, click the commit button on the Options bar (or Ctrl+Enter).
8. Create a Triangle Pattern Image Using the Rectangular Marquee Tool
Select the Rectangular Marquee tool again.
On the Options Bar choose “Add to Selection”.
Create two square selection and then press the Delete key to remove the area inside the selection.
9. Duplicate The Triangle Pattern Layer, Flip Horizontal and then Merge Layer
Duplicate The Triangle Pattern Image by going to Layer>Duplicate Layer.
Choose Edit>Transform>Flip Horizontal.
Use the Move tool to align the two triangles then choose Layer>Merge Down.
Now we have a new pattern, still in a triangle shape.
10. Duplicate The New Pattern, rotate by 60 degrees and then merge layer
Choose Layer>Duplicate layer to duplicate the new pattern.
Rotate by 60 degrees using Free Transform (Ctrl+T).
Use the Move tool to align the two triangles.
Choose Layer>Merge Down to merge both layers.
Now we have a new pattern in 4 sided polygon.
11. Duplicate The New Pattern, rotate by 120 degrees and then align it
Choose Layer>Duplicate layer to duplicate the new pattern.
Rotate by 120 degrees using Free Transform (Ctrl+T).
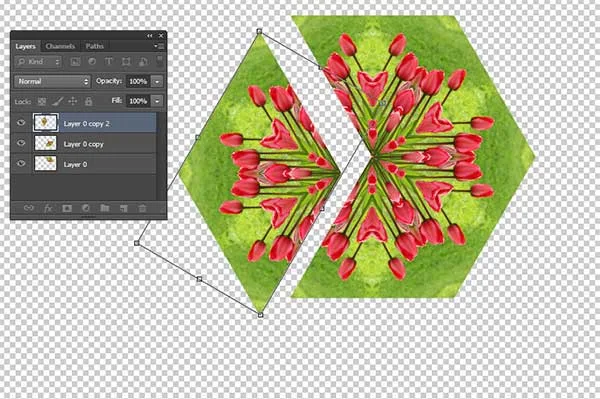
Now we have two layers both in 4 sided polygon shape.
Use the Move tool to align the two shapes.
Duplicate The New Pattern.
Rotate by 120 degrees.
Use the Move tool to align the two shapes.
12. Duplicate The Top Layer, rotate by 120 degrees and then align it
Select the top layer in the Layers panel.
Choose Layer>Duplicate layer to duplicate the top layer.
Use Free Transform (Ctrl+T) to rotate it by 120 degrees.
Use the Move to align both shape.
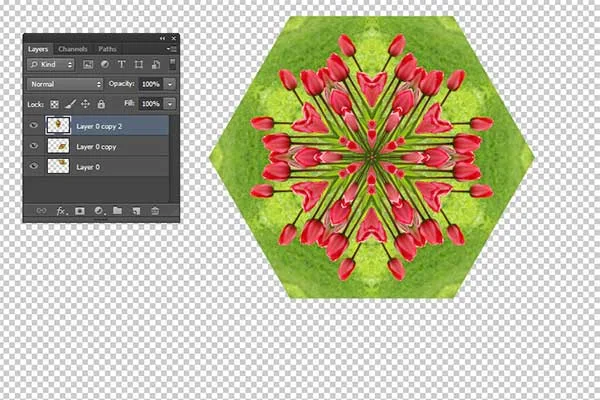
Now we have three layers in 4 sided polygon shapes.
Duplicate the top layer.
Rotate by 120 degrees.
Use the Move tool to align it.
13. Group Layer
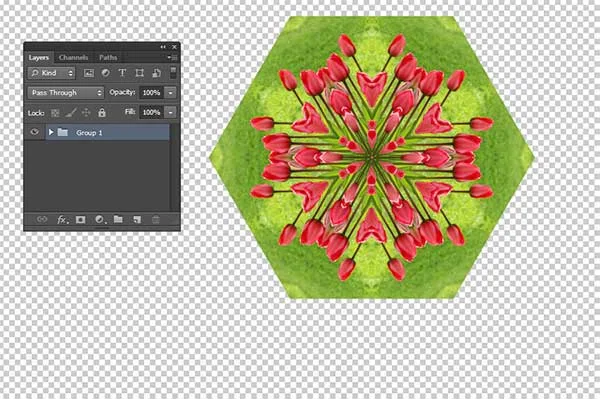
Click all layers while holding down the Shift key then go to Layer>Group Layer.
Group Layer.
14. Duplicate the Layer's Group for Backup
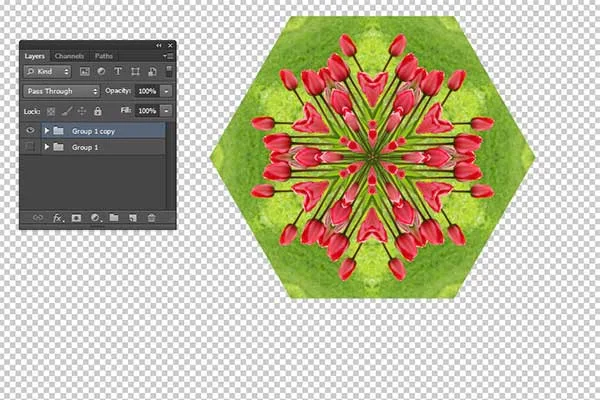
Choose Layer>Duplicate Group to duplicate the layer's group for Backup.
Duplicate the layer's group for backup.
15. Merge Group
Select the top layer's group.
Choose Layer>Merge Group to merge all layers in the top group layer.
Now we have a hexagon pattern.
Merge Group. Now we have a hexagon pattern.
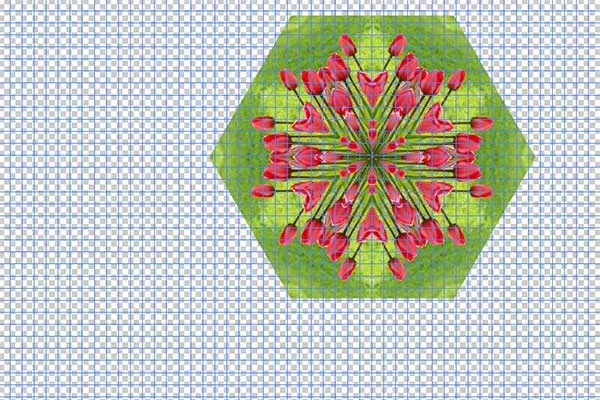
16. Create The Grid
We need to create the grid to assist us in laying out kaleidoscope pattern symmetrically.
It is pretty easy to make the grid in Photoshop.
To add the grid, choose View>Show>Grid.
Create the Grid.
17. Set Your Grid Preferences
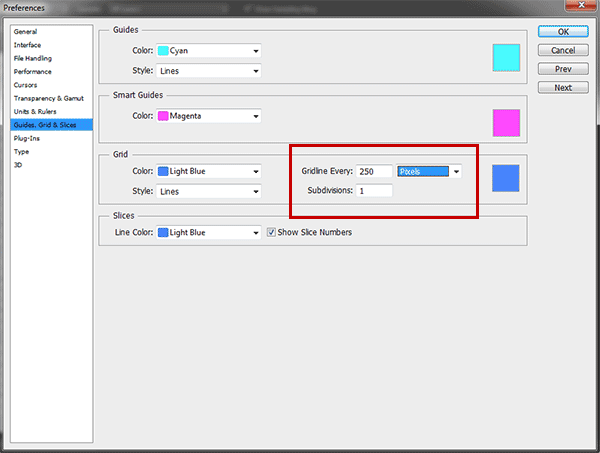
Open up the grid preferences, choose Edit> Preferences> Guides, Grid & Slices.
In the preference dialog box, choose the color you want for the grid lines.
I will set the “Gridline every” option to be 250 pixels and “Subdivisions” option to be 1.
You can choose View>Snap to enabling snaping that will help you to align any object you want.
Set Your Grid Preferences.
18. Adjust The Pattern Size and Position Using Free Transform
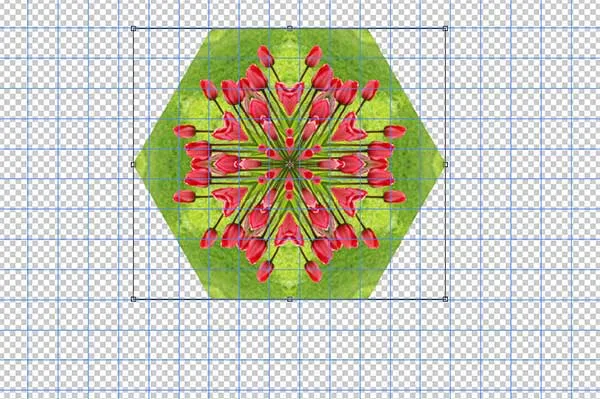
Go to Edit>Free Transform.
You can now edit the pattern as follows:
Adjust The Pattern Size and Position Using Free Transform.
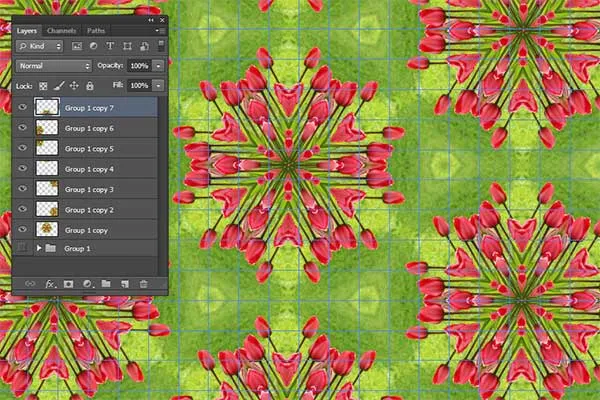
19. Duplicate The Hexagon Layer and Align it
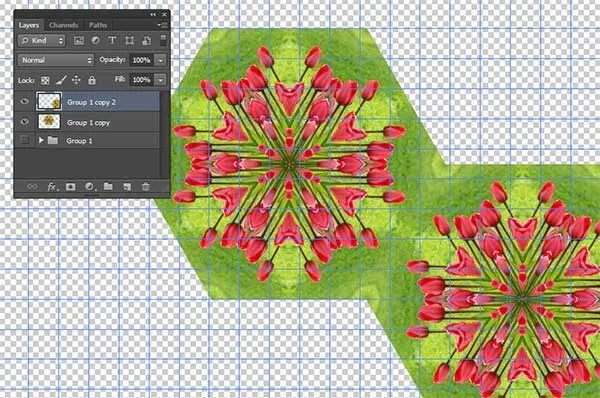
Duplicate The Hexagon Layer by going to Layer>Duplicate Layer (or Ctrl+J).
Select the Move Tool on the Tool panel then click and drag the duplicate hexagon layer to align it on canvas.
Repeat these steps until your document filled with the pattern.
You can now remove the Grid by going to View>Show>Grid.
Duplicate The Hexagon Layer and Align it.
Repeat these steps until your document filled with the pattern.
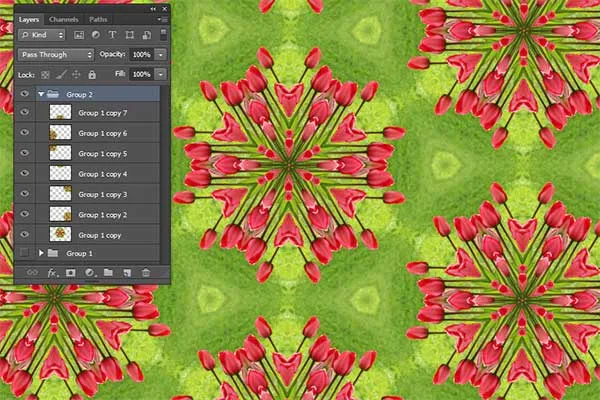
20. Group All Layer
While holding down the Shift key, click on all layer then choose Layer> Group Layers.
Group All Layer.
21. Save Your Document
Choose File>Save (or Ctrl+S) to save your project file.
In the Save As dialog box, navigate to the folder where you want to store your project file.
Type a name in the File Name text box and leave the default Photoshop (*.PSD;*.PDD) format.
PSD is Photoshop's native format and is useful because it stores everything about your image and will allow you to later edit your image in Photoshop, in case you notice a problem.
Click Save to store the project file.
Once you have finished, you will probably also want to export the image in a more widely used format, such as JPEG, PNG, TIFF, etc.
Now we have two layers both in 4 sided polygon shape.
Use the Move tool to align the two shapes.
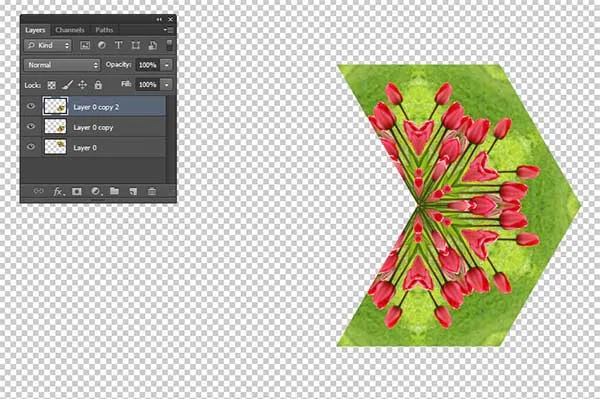
12. Duplicate The Top Layer, rotate by 120 degrees and then align it
Select the top layer in the Layers panel.
Choose Layer>Duplicate layer to duplicate the top layer.
Use Free Transform (Ctrl+T) to rotate it by 120 degrees.
Use the Move to align both shape.
Now we have three layers in 4 sided polygon shapes.
13. Group Layer
Click all layers while holding down the Shift key then go to Layer>Group Layer.
14. Duplicate the Layer's Group for Backup
Choose Layer>Duplicate Group to duplicate the layer's group for Backup.
15. Merge Group
Select the top layer's group.
Choose Layer>Merge Group to merge all layers in the top group layer.
Now we have a hexagon pattern.
16. Create The Grid
We need to create the grid to assist us in laying out kaleidoscope pattern symmetrically.
It is pretty easy to make the grid in Photoshop.
To add the grid, choose View>Show>Grid.
17. Set Your Grid Preferences
Open up the grid preferences, choose Edit> Preferences> Guides, Grid & Slices.
In the preference dialog box, choose the color you want for the grid lines.
I will set the “Gridline every” option to be 250 pixels and “Subdivisions” option to be 1.
You can choose View>Snap to enabling snaping that will help you to align any object you want.
18. Adjust The Pattern Size and Position Using Free Transform
Go to Edit>Free Transform.
You can now edit the pattern as follows:
- Resize the pattern by dragging any corner while holding down the Shift key to keep the pattern does not distort.
- Move the pattern by clicking and hold anywhere inside the pattern and drag.
- Rotate the pattern by moving your cursor farther out from any corner until you see two arrows. Click and hold, then drag the pattern.
- Press Enter key when you are done.
19. Duplicate The Hexagon Layer and Align it
Duplicate The Hexagon Layer by going to Layer>Duplicate Layer (or Ctrl+J).
Select the Move Tool on the Tool panel then click and drag the duplicate hexagon layer to align it on canvas.
Repeat these steps until your document filled with the pattern.
You can now remove the Grid by going to View>Show>Grid.
20. Group All Layer
While holding down the Shift key, click on all layer then choose Layer> Group Layers.
21. Save Your Document
Choose File>Save (or Ctrl+S) to save your project file.
In the Save As dialog box, navigate to the folder where you want to store your project file.
Type a name in the File Name text box and leave the default Photoshop (*.PSD;*.PDD) format.
PSD is Photoshop's native format and is useful because it stores everything about your image and will allow you to later edit your image in Photoshop, in case you notice a problem.
Click Save to store the project file.
Once you have finished, you will probably also want to export the image in a more widely used format, such as JPEG, PNG, TIFF, etc.






No comments:
Post a Comment