In today's tutorial, you will learn how to create a heart photo card collage in Photoshop. We'll be using the rectangle tool, the Custom Shape tool, the grid, the Free Transform and Clipping Mask that comes with Photoshop. Once you have arranged all shapes to your satisfaction, you can play around with other Photoshop tools to add your artistic effects. Let's get started!
Download This Heart Collage Template
Download Photoshop Heart Photo Card Collage template here or browse others free Photoshop Collage Templates.
Watch the video for detailed instructions and use the written steps for quick reference.
If you liked my tutorials, please subscribe to my YouTube channel - JTSGraph.
1. Create a new document.
Choose File> New (or Ctrl+N). In the pop-up window, type a name in the Name field and enter the following information: Width 3000 pixels, Height 2000 pixels, Resolution 300 Pixels/Inch, Color Mode RGB color, and Background contents White. Click OK.
2. Show the Grid.
Now create a grid to assist us in laying out selections symmetrically. Choose View>Show>Grid. Choose View>Snap and then choose View>Snap to>Grid, to enabling snaping that will help you to align any object, shape or selection you want. Open up the grid preferences, choose Edit> Preferences> Guides, Grid & Slices.
This will open a preference dialog box. Choose the color you want for the grid lines. Set the “Gridline every” option to be 500 pixels and “Subdivisions” option to be 1.
3. Grab the Rectangle Tool.
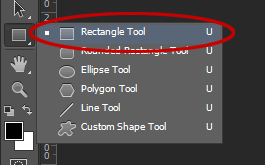
Select the Rectangle Tool from the Tools panel (or just press U). Press Shift+U to cycle through the six available shape tools until the one you want is active.
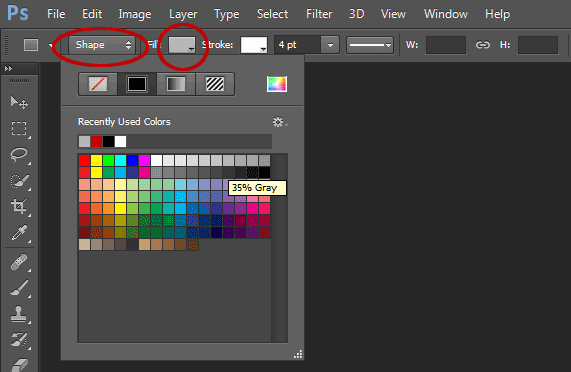
In the Options Bar, make sure Shape is chosen from the menu then choose shape color. To choose the color of the shape, click the color swatch in the options bar, and then choose a color available.
You can also choose a color from the Color Picker. Lastly, fill the stroke size.
4. Draw a rectangle shape.
Click inside your document and drag away from the starting point. When you release your mouse button, Photoshop completes the rectangle shape and fills it with your chosen color.
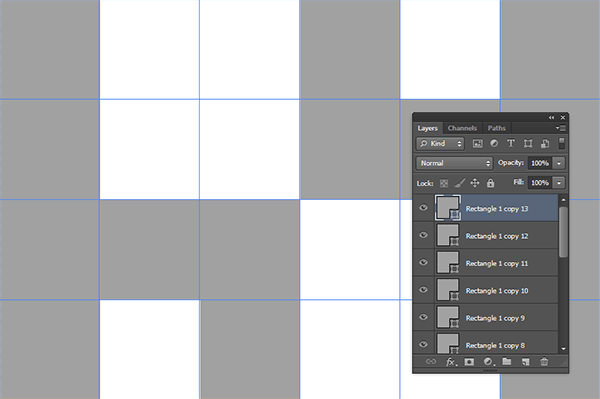
Now duplicate the rectangle shape by going to Layer> Duplicate Layer (Ctrl+J). Then resize and reposition your duplicate rectangle shape layer using the Move tool. Duplicate the rectangle shape layer as many as you want and then arranged it all to your satisfaction.
5. Grab the Custom Shape tool.
Select the Custom Shape Tool from the Tools panel (or press U).
Select a heart shape from the Custom Shape pop-up panel.
If you do not find a heart shape in the panel, click the arrow in the upper-right corner, and choose “All”.
6. Draw Heart-Shaped in Canvas.
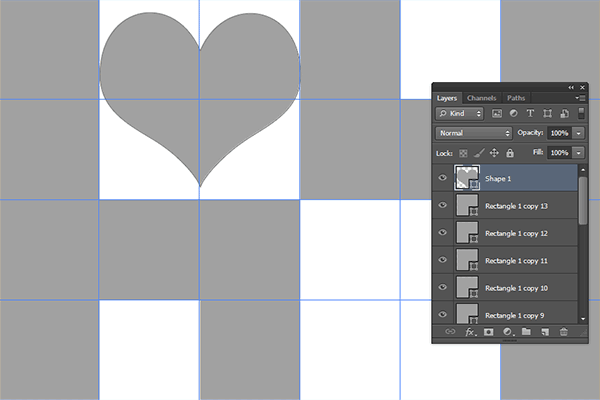
To draw a Heart-Shaped, click inside your document and drag away from the starting point. When you release your mouse button, Photoshop completes the Heart Shape and fills it with your chosen color.
Arranged all shapes to your satisfaction.
7. Save file as template.
Choose File>Save (or Ctrl+S) to save your project file as a template for later use. Navigate to the folder where you want to store your template file. Type a name in the File Name text box and leave the default Photoshop (*.PSD;*.PDD) format. Click Save to store the project file. Save this template file so that someday you can use it again.
8. Insert image.
Stock images used in this Photoshop Collage tutorial: 1633204, 1150487, 1963748, 602553, 943449, 1210012, 731413, 388917, 690346, 1326994, 1590009, 1116317, 210230, 1116316, 1633202, 1790984, 1206240, 2482613.
Select the layer to which you want to insert an image. Go to File> Place to open the picture you'd like to insert. Click on the picture, then click OK.
You can now edit and move the picture as follows:
- Resize the picture by dragging any corner while holding down the Shift key to keep the picture does not distort.
- Move the picture by clicking and hold anywhere inside the image and drag.
- Rotate the picture by moving your cursor farther out from any corner until you see two arrows. Click and hold, then drag the picture.
- Press Enter key when you are done.
9. Create Clipping Mask.
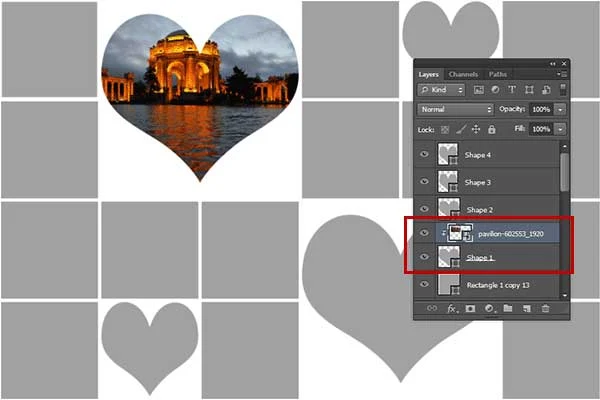
On the Layers panel, make sure the layers to be clipped are listed consecutively. Remember, you must stack the image layer above the Rectangle layer. Click the image layer to be clipped, then choose Layer>Create Clipping Mask (or Alt+Ctrl+G) to create a clipping mask. When layers are put into a clipping mask, the content of the bottommost layer (the Rectangle layer), clips the layers above it (the image layer).
10. Insert other images.
Repeat steps 8 through 10 to open and manipulate each picture you'd like to insert.
11. Save document.
Choose File>Save (or Ctrl+S) to save your project file. Navigate to the folder where you want to store your project file. Type a name in the File Name text box and leave the default Photoshop (*.PSD;*.PDD) format. Click Save to store the project file.
Once you have finished, you will probably also want to use File>Save As (Shift+Ctrl+S) to export the image in a more widely used format, such as JPEG, PNG, TIFF, etc.









No comments:
Post a Comment