In this GIMP tutorial, we are going to learn how to create a spherical photo collage. We'll be using the Ellipse Select Tool and the Spherize filter that comes with GIMP. To create the reflection, we will use a layer mask and the gradient tool. We can play around with GIMP's many tools to add our own artistic effects. Let's get started!
First, create your Grid Collage using GIMP, or squares collage using GIMP, or create a contact sheet using IrfanView or create a contact sheet using Photoshop.
Export your collage as JPEG format.
Export your collage as JPEG format.
Use File>Open... command in the top menu or else just press Ctrl+O to open your image.
The “Open Image” dialog will appear, allowing you to navigate to the file and click on its name.
Navigate through your folders in the Places panel and the Name panel until your images' name appears in the Name panel.
Click the image you want to open.
When an image file is selected, you can view the preview of the image file at the right-hand side of the box, although it's not easy to find an image based on a thumbnail.
Click the Open button.
2. Add Transparency
An alpha channel represents the transparency of the image.
Because this image has only one layer, this background layer has no Alpha channel.
Use Layer>Transparency>Add Alpha Channel to add transparency.
Because this image has only one layer, this background layer has no Alpha channel.
Use Layer>Transparency>Add Alpha Channel to add transparency.
3. Draw a Circle Selection
Select the Ellipse Select Tool from the toolbox or else use Tools> Selection Tools> Ellipse Select (E).
Click and drag your mouse to choose a portion of the document.
Just leave the mouse when you are done.
You should see a dotted line or marching ants outline the selection.
Now, the selected portion of the document has been picked or selected.
Click and drag your mouse to choose a portion of the document.
Just leave the mouse when you are done.
You should see a dotted line or marching ants outline the selection.
Now, the selected portion of the document has been picked or selected.
4. Apply the Spherize Filter
To create a spherical, we will apply the Spherize filter.
Go to Filter>Distort>Spherize to apply the Spherize filter.
The Spherize dialog box appears.
Here you can set Mode to Radial, Angle of View to 0, Curvature to 1, Amount to 1, Resampling Method to Linear and choose Use the selection as input.
Click OK.
Go to Filter>Distort>Spherize to apply the Spherize filter.
The Spherize dialog box appears.
Here you can set Mode to Radial, Angle of View to 0, Curvature to 1, Amount to 1, Resampling Method to Linear and choose Use the selection as input.
Click OK.
5. Delete the Background
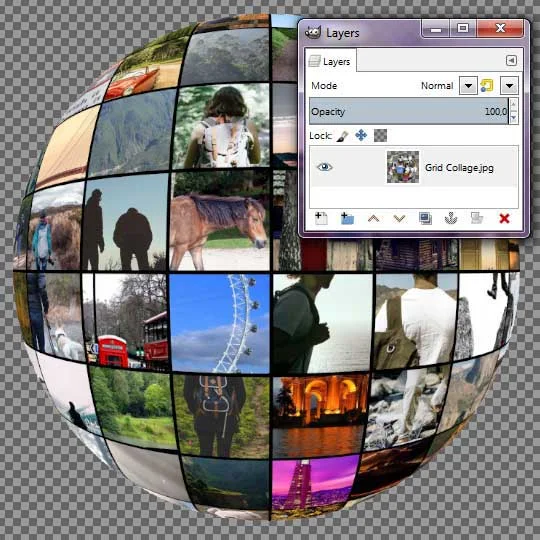
Go to Select>Invert to invert the selection and delete the Background by going to Edit>Clear.
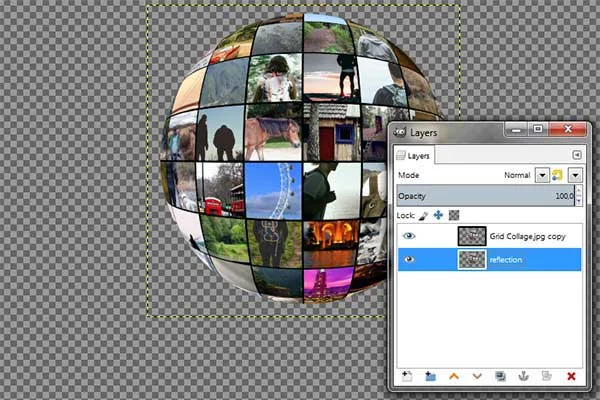
Now we have a spherical collage. Use Select>None to remove the selection.
Now we have a spherical collage. Use Select>None to remove the selection.
6. Resize the Spherical Collage Using the Scale Tool
Use Tools>Transform Tools>Scale command to resize the spherical Collage.
Click anywhere inside the collage.
In the Scale dialog box, click the chain icon to keep the Collage does not distort.
Enter new values for the collage's width and height manually or through the up and down arrows.
Press the Scale button when you are done.
Click anywhere inside the collage.
In the Scale dialog box, click the chain icon to keep the Collage does not distort.
Enter new values for the collage's width and height manually or through the up and down arrows.
Press the Scale button when you are done.
7. Move the Spherical Collage Using the Move Tool
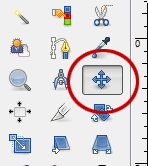
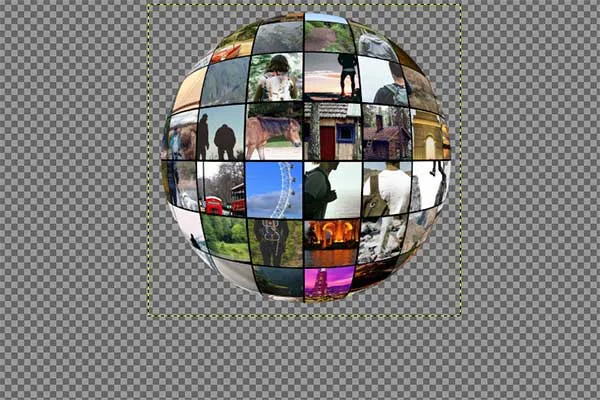
Use Tools>Transform Tools>Move command to move the Spherical Collage.
Click and hold anywhere inside the Spherical Collage and drag.
Click and hold anywhere inside the Spherical Collage and drag.
8. Duplicate Layer to Create Reflection
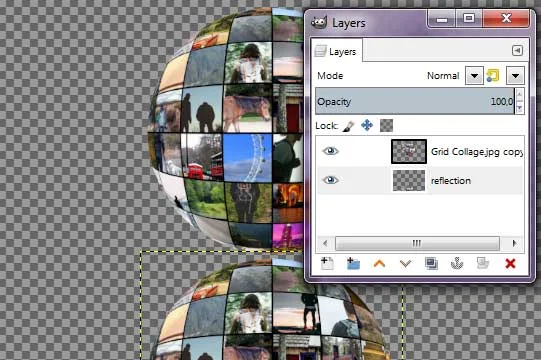
Use Layer> Duplicate Layer (or by using the keyboard shortcut Shift+Ctrl+D).
A new layer which is a nearly identical copy of the active layer added to the image.
Rename the duplicate layer to “Reflection”.
A new layer which is a nearly identical copy of the active layer added to the image.
Rename the duplicate layer to “Reflection”.
Now select the duplicate layer on the Layers Dialog.
Click the Move Tool icon or else use Tools>Transform Tool>Move and then Click and hold anywhere inside the duplicate layer and drag down below the original layer.
Click the Move Tool icon or else use Tools>Transform Tool>Move and then Click and hold anywhere inside the duplicate layer and drag down below the original layer.
9. Flip Vertically
Select the reflection layer on the Layers dialog.
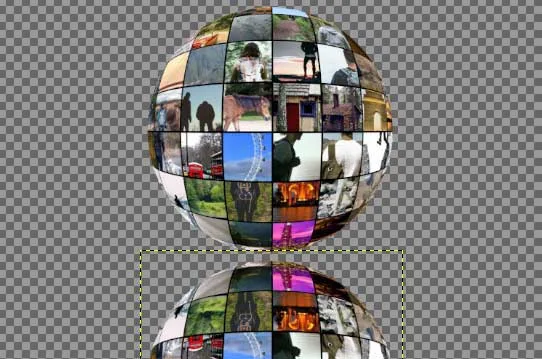
Use Tools>Transform Tools>Flip or else just press Shift+F to flip the reflection layer.
Select the Tool Options Dialog.
Select Layer for Transform and under Direction, select Vertical.
Click on the image to flip it vertically.
Use Tools>Transform Tools>Flip or else just press Shift+F to flip the reflection layer.
Select the Tool Options Dialog.
Select Layer for Transform and under Direction, select Vertical.
Click on the image to flip it vertically.
10. Add Layer Mask
Make sure the reflection layer is selected on the Layers Dialog.
Use Layer> Add Layer Mask.
The Add Layer Mask dialog box appears.
Here you can choose “White (Full Opacity)”.
Use Layer> Add Layer Mask.
The Add Layer Mask dialog box appears.
Here you can choose “White (Full Opacity)”.
11. Apply Gradient
Select the Gradient Tool from the Toolbox or else you can use Tools>Paint Tools>Gradient.
Select the Tool Options dialog and choose FG to BG.
Make sure your foreground and background color are in black and white by pressing keyboard key D.
Click on the layer mask box.
Apply gradient by click and drag on the document from bottom to top.
Select the Tool Options dialog and choose FG to BG.
Make sure your foreground and background color are in black and white by pressing keyboard key D.
Click on the layer mask box.
Apply gradient by click and drag on the document from bottom to top.
12. Create a New Layer From Visible
Go to Layer>New from visible.
This will merges the visible layers into a new layer at the top of the layer stack.
You can duplicate this new layer and arrange it to your satisfaction.
This will merges the visible layers into a new layer at the top of the layer stack.
You can duplicate this new layer and arrange it to your satisfaction.
13. Save Your Document
Use File>Save command in the top menu or else just press Ctrl+S to save your project file.
The Save Image dialog box appears.
Navigate to the folder where you want to store your project file.
Type a name in the Name text box and leave the default GIMP (*.XCF) format.
XCF is GIMP's native format and is useful because it stores everything about your image and will allow you to later edit your image in GIMP, in case you notice a problem.
Click Save to store the project file.
Once you have finished, you will probably also want to export the image in a more widely used format, such as JPEG, PNG, TIFF, etc.
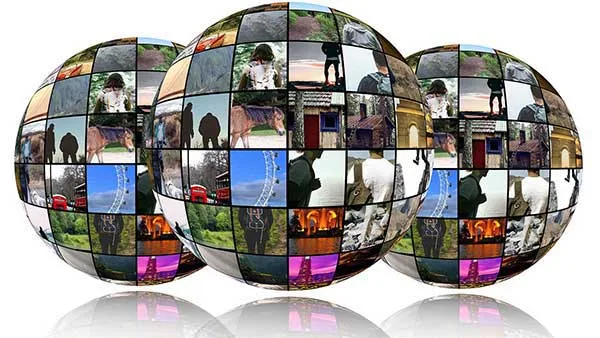
Here is the result:
See also other GIMP Collage tutorials:










No comments:
Post a Comment