In today's tutorial we'll learn how to create tilt shift in Photoshop by applying a tilt-shift blur filter to the
duplicate layer then adjust the hue-saturation to get a good
miniature photo effect. Photos that are suitable for this effect
are photos of urban or garden landscapes. Portrait photos are not
suitable for tilt-shift effects.
Steps to make a miniature / tilt-shift effect in Photoshop:
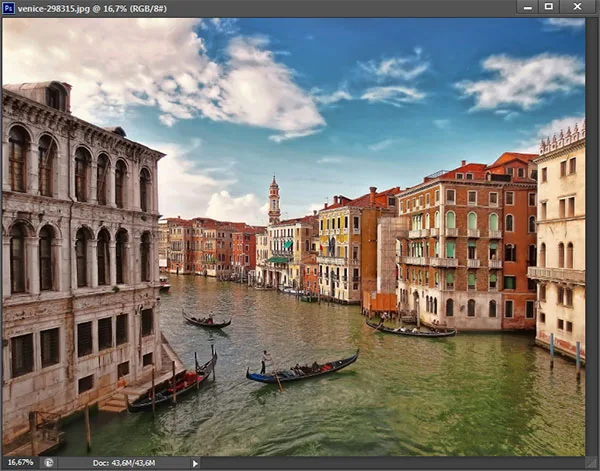
1. Open Photo.Choose File > Open, select your photo, then click the Open button. I took the photo source for this Photoshop tutorial from Pixabay.com.

Drag the Saturation slider slightly to the right.
There you have it! How to Create Tilt-Shift in Photoshop.


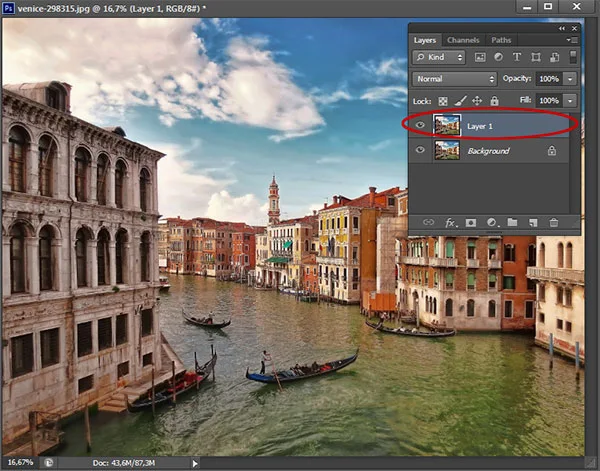
2. Duplicate layer.
In order not to damage the original photo, duplicate the layer by pressing Ctrl+J.
3. Apply the Tilt Shift filter.
With the duplicate layer position active, select Filter>Blur>Tilt-Shift.
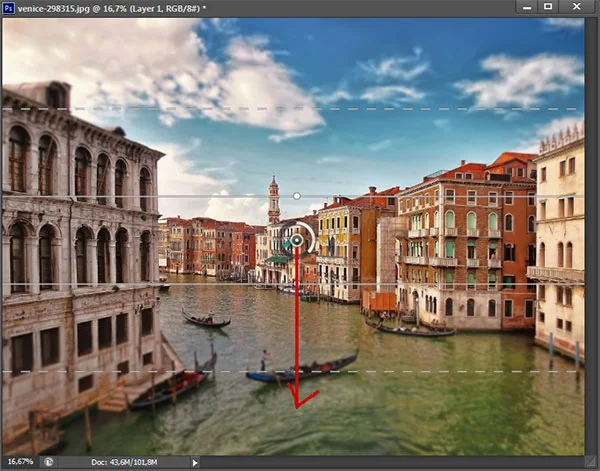
4. Adjust Lens Focus.
Click on the lens focus circle, then drag in the direction you want. In the sample photo, I'll be dragging it down to give the lens focus on the boat.
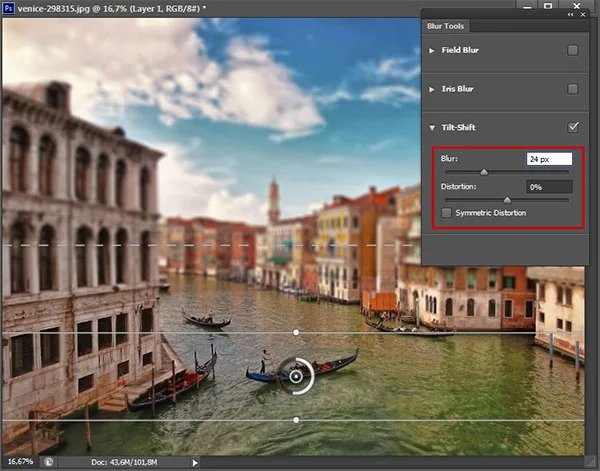
5. Set the Blur Level.
Set the amount of blur you want. I'm going to fill it with 24 pixels. Press the OK button or press Enter to apply it.
6. Change the Hue/Saturation.
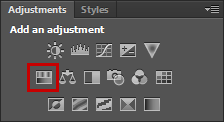
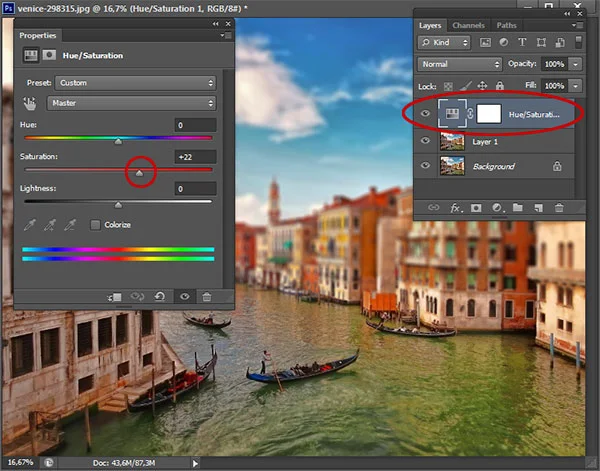
To make it look more like a miniature city of Venice, I'm going to adjust the Hue/Saturation. Click the Adjustment Hue/Saturation icon or you can also choose Layer>New Adjustment Layer>Hue/Saturation menu. Drag the Saturation slider slightly to the right.

There you have it! How to Create Tilt-Shift in Photoshop.

More on Photoshop tutorial:

No comments:
Post a Comment