You can download the trial version of Photoshop CC on the Adobe Photoshop site.
Here is a list of Photoshop tutorials, a picture editing application available for MacOS and Windows operating system.
The trick is to create a new document, write your text on the canvas, and copy the text layer. Behind the text in the copy text layer and move it to the position under the main text. The final step is create a layer mask on a copy of the text layer and apply the black to white gradient on the layer mask.
The first layer (bottom layer) for the background, the second layer for the reflection and the third layer (the top layer) is the object itself. Reflection on the second layer is made by duplicating the object layer then applying Flip Vertical Transform command.
Make a selection using selection tool and then duplicate into separate layer. Apply drop shadow layer style. Right click on that drop shadow then choose Create layer. So we will create three layers namely background, object layer and shadow layer.
After finished making the selection, create a layer mask. Furthermore, please apply the adjustment layer levels, curves, hue / saturation, black & white, and color balance, to get a natural and whiter skin color.
By adjusting the properties Shadow, Midtones and Highlights. First, make a selection on the eyeball. You can use your favorite selection tool. In this tutorial I will make a selection using the Pen Tool. Then we change path into a selection.
By adjusting the hue / saturation slider in Image>Adjustment>Replace Color command. If you only want to change the color on a specific area in the picture we have to make the selection beforehand. Selecting at Photoshop does require patience.
Create a new transparent layer with Overlay blending mode. Then click the gradient tool, select the linear gradient, and choose a color gradient. Then apply the gradient on the document by clicking and then drag on the hair area in your photo.
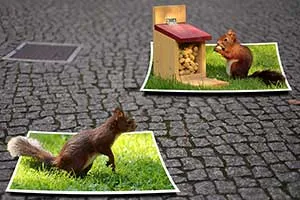
In today's Photoshop tutorial, I am going to take you through the process of turning a photo into a collage of Polaroids using the Rectangular Marquee tool, Clipping Mask (Layer>Create Clipping Mask), Drop Shadow layer style (Layer>Layer Style>Drop Shadow) and Free Transform (Edit>Free Transform) that comes with Photoshop.
Here is a tutorial on how to make a circular collage using Photoshop. We will create three horizontal and three vertical guidelines using View> New Guide command to help us position any object precisely, Elliptical Marquee tool to draw the circle selection, File>Place command to insert images, Layer>Create Clipping Mask to create clipping mask and using Free Transform (Edit>Free Transform) to arrange our Photo Collage.
There are 14 action frame provided in Photoshop CS6, including spatter frame, stroke frames, photo corners and others. This tutorial will give an example to make a corner photo frame. After applying the action photo corners, it will automatically formed layers.
Make a rectangle selection using the Rectangle Marquee Tool, give stroke, adjust using Free Transform, add Perspective and Warp, use photoshop masking to show out of frame photo collage from the background, add drop shadow, and finally add background picture.
First, create a new layer for frame, fill it with color, then give a border or frame using a selection tool. Create layer mask and then adjust feather to give faded frame effect.
The first step is to create a new layer to be used as a background. Choose a color using color picker. Furthermore duplicate the background to apply the filter. Create a border selection on the background copy using Select>All then choose Select>Modify>Border.
In today tutorial, we are going to learn how to make a Grid Collage In Adobe Photoshop using Guides (View> New Guide), Free Transform (Edit>Free Transform), Rectangular Marquee Tool and Layer Style (Layer>Layer Style) that comes with Photoshop.
The first step is to create a selection using the selection tool Quick Selection and the Polygonal Lasso. Quick Selection Tool is used to create a rough selection, while Polygonal Lasso Tool is used to remove parts of the selection we do not want. To refine the results of the selection will be used refine mask.
Over the following steps, I will show you how to create a photo mosaic
in Adobe Photoshop using Pattern (Edit> Define Pattern) and Guides
(View> New Guide) to help us position images. By combining the use of
Guides with the “Snap” feature, we can perfectly align images along
guidelines. We'll experiment with a variety of imagery to build up a
digital mosaic.
Simply by using the rectangle marquee selection tool, we can create
multiple frame photo collage in Photoshop. To form a picture frame,
create a layer-shaped frame selection separately, then fill its border
with white color, and give emboss style or drop shadow. Adjust its
position on the photo using Free Transform.
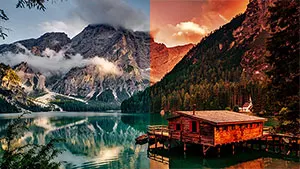
8. Sunset effect in Photoshop

Photo
Filter is a tool that is easy to use and quick to make the picture
becomes warmer or more shade. But if we want a more flexible
arrangement, then the gradient map adjustment is a better choice. At
this tutorial we will explained how to create a sunset effect using a
gradient map.


No comments:
Post a Comment